Contact for Pricing
Overview
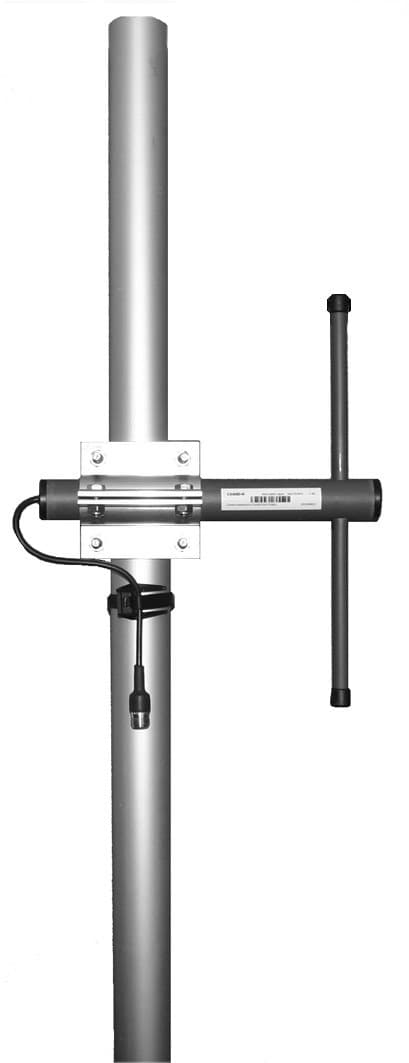
- Frequency range: 135-145 MHz
- Gain: 5 dBi with vertical/horizontal polarization
- VSWR: <1.5 for optimal signal integrity
- Connector options: N-, TNC-, or 7/16-female
- Wind load: 63 N with pole mounting for 35-60 mm diameters
Specifications
Connector | N-/TNC-/7/16-female |
Frequency | 135-145 MHz |
Gain | 5 dBi |
Length | 570 mm |
Mounting Diameter | Ø 35-60 |
Polarization | vertical/horizontal |
Radiator Material | copper |
Radome | FG, PU foam |
VSWR | <1.5 |
Weight | 905 g |
Wind Load | 63 N @ 150 km/h |
CA420D
offset pattern dipole - Frequency range: 405-440 MHz - Gain: 5 dBi - Polarization: vertical/horizontal - Connector: N-/ TNC-/ 7/16-female - VSWR: <1.5 - Radome: ABS/FG PU foam - Radiator material: copper - Mounting: 35-60 mm diameter pole - Wind load: 33 NCA450D
offset pattern dipole - Frequency range: 440-475 MHz - Gain: 5 dBi - Polarization: vertical/horizontal - Connector: N-/ TNC-/ 7/16-female - VSWR: <1.5 - Radome: ABS/FG PU foam - Radiator material: copper - Mounting: 35-60 mm diameter pole - Wind load: 32 NCA400D
offset pattern dipole - Frequency range: 380-410 MHz - Gain: 5 dBi - Polarization: vertical/horizontal - Connector: N-/ TNC-/ 7/16-female - VSWR: <1.5 - Radome: ABS/FG PU foam - Radiator material: copper - Mounting: 35-60 mm diameter pole - Wind load: 34 NCA930D
offset pattern dipole - Frequency range: 880-960 MHz - Gain: 5 dBi - Polarization: vertical/horizontal - Connector: N-/ TNC-/ 7/16-female - VSWR: <1.5 - Radome: ABS/FG PU foam - Radiator material: copper - Mounting: 35-60 mm diameter pole - Wind load: 25 NCA230D
offset pattern dipole - Frequency range: 221-239 MHz - Gain: 5 dBi - Polarization: vertical/horizontal - Connector: N-/ TNC-/ 7/16-female - VSWR: <1.5 - Radome: ABS/FG PU foam - Radiator material: copper - Mounting: 35-60 mm diameter pole - Wind load: 45 NCA85D
offset pattern dipole - Frequency range: 83-88 MHz - Gain: 5 dBi - Polarization: vertical/horizontal - Connector: N-/ TNC-/ 7/16-female - VSWR: <1.5 - Radome: ABS/FG PU foam - Radiator material: copper - Mounting: 35-60 mm diameter pole - Wind load: 84 NCA340D
offset pattern dipole - Frequency range: 326-353 MHz - Gain: 5 dBi - Polarization: vertical/horizontal - Connector: N-/ TNC-/ 7/16-female - VSWR: <1.5 - Radome: ABS/FG PU foam - Radiator material: copper - Mounting: 35-60 mm diameter pole - Wind load: 36 NCA860D
offset pattern dipole - Frequency range: 830-890 MHz - Gain: 5 dBi - Polarization: vertical/horizontal - Connector: N-/ TNC-/ 7/16-female - VSWR: <1.5 - Radome: ABS/FG PU foam - Radiator material: copper - Mounting: 35-60 mm diameter pole - Wind load: 25 NCA170D
offset pattern dipole - Frequency range: 163-177 MHz - Gain: 5 dBi - Polarization: vertical/horizontal - Connector: N-/ TNC-/ 7/16-female - VSWR: <1.5 - Radome: ABS/FG PU foam - Radiator material: copper - Mounting: 35-60 mm diameter pole - Wind load: 55 NCA150D
offset pattern dipole - Frequency range: 144-156 MHz - Gain: 5 dBi - Polarization: vertical/horizontal - Connector: N-/ TNC-/ 7/16-female - VSWR: <1.5 - Radome: ABS/FG PU foam - Radiator material: copper - Mounting: 35-60 mm diameter pole - Wind load: 60 NCA380D
offset pattern dipole - Frequency range: 365-395 MHz - Gain: 5 dBi - Polarization: vertical/horizontal - Connector: N-/ TNC-/ 7/16-female - VSWR: <1.5 - Radome: ABS/FG PU foam - Radiator material: copper - Mounting: 35-60 mm diameter pole - Wind load: 35 NCA350D
offset pattern dipole - Frequency range: 336-364 MHz - Gain: 5 dBi - Polarization: vertical/horizontal - Connector: N-/ TNC-/ 7/16-female - VSWR: <1.5 - Radome: ABS/FG PU foam - Radiator material: copper - Mounting: 35-60 mm diameter pole - Wind load: 36 NHow to Install the CA140D Controller
This guide provides step-by-step instructions for installing and configuring the CA140D Controller, ensuring proper setup and functionality.
Estimated time: 1h
Tools needed:
Screwdriver, Wire strippers, Multimeter
Supplies needed:
Mounting screws, Wire connectors, Self-amalgamating tape
- Mount the controller
Secure the CA140D Controller to the designated mounting surface using the provided mounting screws. Ensure it is level and firmly attached.
- Connect the wiring
Strip the ends of the wires and connect them to the appropriate terminals on the CA140D Controller. Use wire connectors to secure the connections.
- Seal the connections
Cover all connectors and cable junctions with self-amalgamating tape to ensure proper weather protection and prevent moisture ingress.
- Verify the connections
Use a multimeter to check the voltage and continuity of the connections to ensure they are correctly wired and functioning.
- Configure the controller
Follow the manufacturer's instructions to program the CA140D Controller settings according to your specific application requirements.
- Calibrate the controller
Perform any necessary calibration procedures as outlined in the user manual to ensure accurate operation of the CA140D Controller.