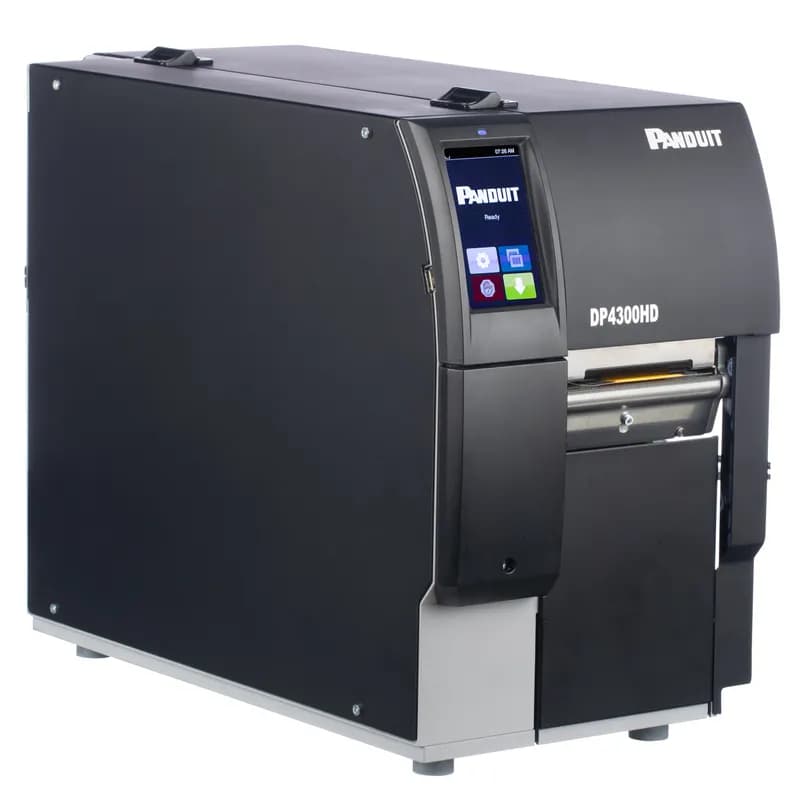
Contact for Pricing
Overview
- Produces high-quality, two-sided print-on-demand labels for wire and cable marking.
- Utilizes Panduit Two-Sided Heat Shrink Labels for durable identification.
- Features a 300 dpi print resolution for clear, legible markings.
- Includes an integrated touchscreen for simplified operation and label design.
- Bundled with Easy-Mark™ Labeling Software, ribbons, and necessary accessories for UK, Germany, Switzerland, and China.
Specifications
Printing Rate | 5.9 in/s |
Printing Rate | 149.86 mm/s |
Resolution | 300 dpi |
Standard | RoHS Compliant |
Type | Desktop Printer |
Package Dimensions (L x W x H) | 30.6 IN x 16.1 IN x 20.4 IN |
Package Dimensions (L x W x H) | 77.724 cm x 40.894 cm x 51.816 cm |
Package Weight (Imperial) | 55.0000 L |
Package Weight (Metric) | 24.9480 kg |


LS8E-ACA
The 100 24-Her LS8E and LS8EQ Hand-Held Thermal Transfer Printers is part of the complete line of identification solutions from Panduit. It is available individually or as part of the printer kit.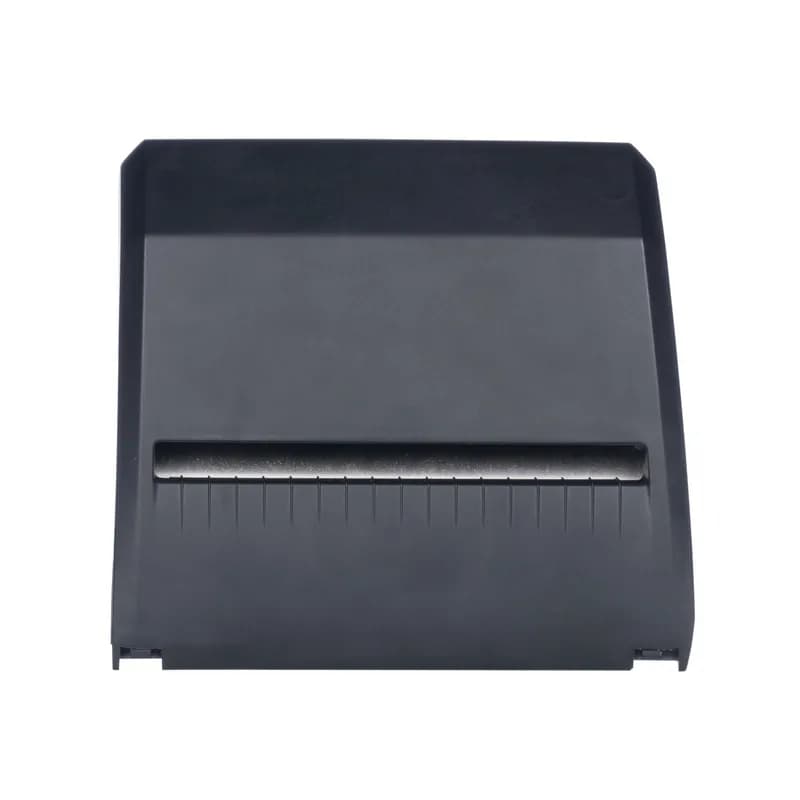
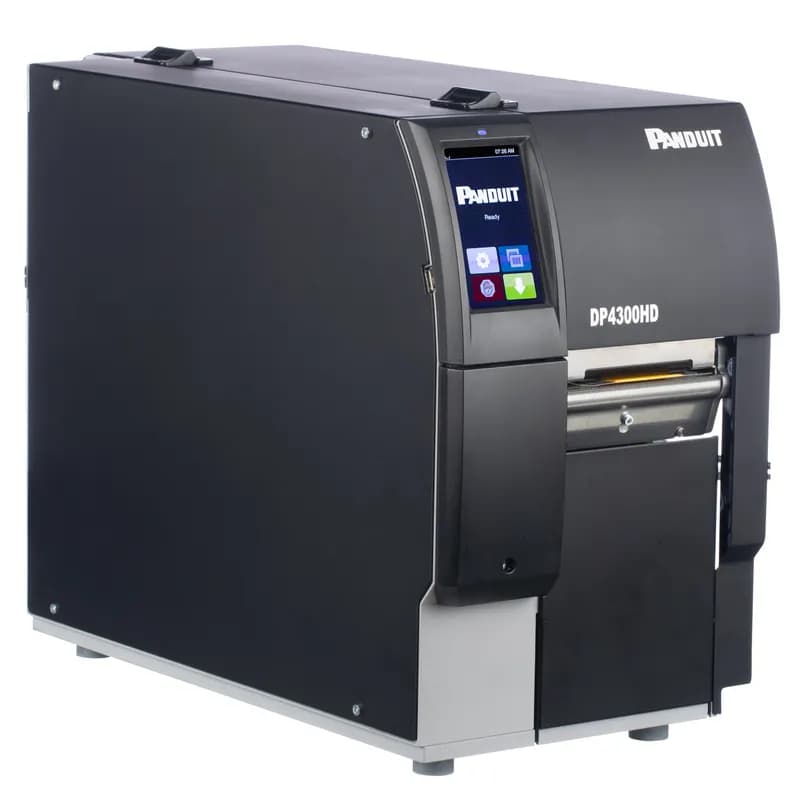
DP4300HD
The DP4300HD Two-Sided Thermal Transfer Desktop Printer produces high-quality print-on-demand labels for wire and cable marking applications using Panduit Two-Sided Heat Shrink Labels. This solution is ideal for labeling in OEM, MRO, and Construction. Includes 300 dpi printer w/ Touch Screen, Easy-Mark™ Labeling Software, 2 rolls of RHEH4BL Black Hybrid Ribbons, USB Cable, Quick Start Guide and US Power Cord. For use in North America.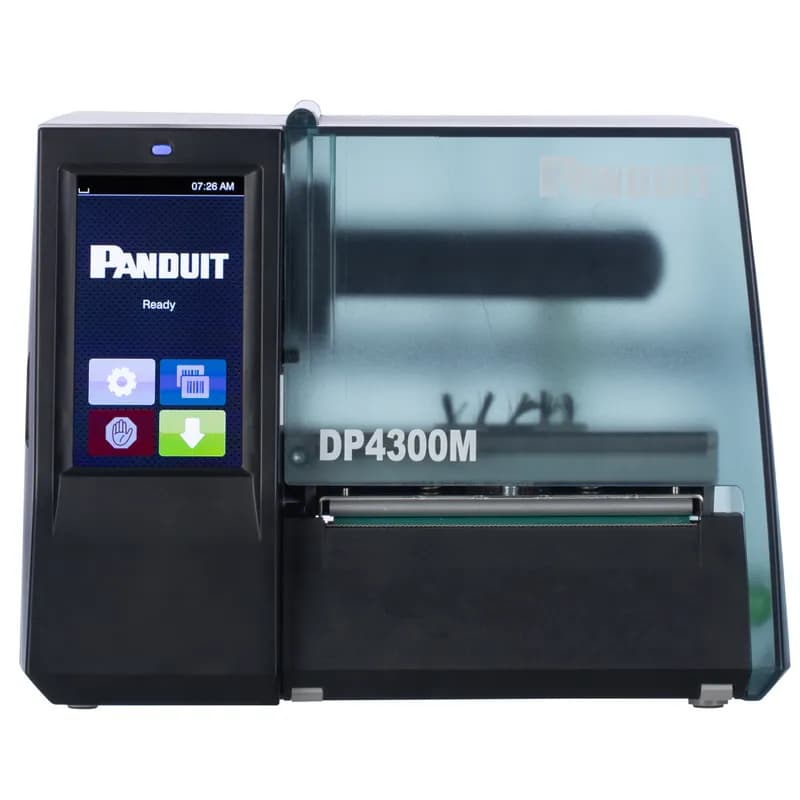
DP4300M/E
The DP4300M/E Thermal Transfer Desktop Printer has 300 dpi resolution and 5.9" per second maximum print speed. Print a variety of self-laminating labels, component labels, non-laminated labels, heat-shrink labels, marker plates, and continuous tapes up to 4" wide. It includes Easy-Mark™ Labeling Software, RMEH4BL black hybrid ribbon, a USB cable, a user manual, a quick start card, and EU, UK, Swiss, Australia, and China power cords; for use outside of North America.
EZ-YHS34
EZL Wire Marker Label for Wire Range 2-4, Heat-Shrink Yellow Polyolefin, 3/4 inch, 5 feet lengthEZ-WHS34
EZL Wire Marker Label for Wire Range 2-4, Heat-Shrink White Polyolefin, 3/4 inch, 5 feet lengthEZ-YHS14
EZL Wire Marker Label for Wire Range 10-16, Heat-Shrink Yellow Polyolefin, 1/4 inch, 5 feet lengthHow to Install and Set Up the Panduit DP4300HD/E Label Printer
This guide provides step-by-step instructions for unpacking, setting up, connecting, and loading media and ribbon into the Panduit DP4300HD/E label printer.
Estimated time: 45m
Tools needed:
Allen key
Supplies needed:
Label roll, Transfer ribbon (if not direct thermal), Ribbon core, Adhesive tape, Wi-Fi stick (optional), Power cable, USB cable (optional), Ethernet cable (optional)
- Unpack and Position the Printer
Lift the label printer out of its box and check for any damage that may have occurred during transport. Set up the printer on a level surface. Remove any foam transportation safeguards located near the printhead. Verify that all contents of delivery are present. Attention: Set up label printers only in dry locations protected from splash water to prevent damage to the device and printing materials.
- Install the Optional Wi-Fi Stick
If using a Wi-Fi stick, remove the cover with the Allen key. Connect the Wi-Fi stick to the USB interface in the control panel.
- Connect the Printer to Power
Ensure the device is switched off. Plug the power cable into the power connection jack (33) on the printer. Plug the other end of the power cable into a grounded socket. Danger: The device is configured for voltages of 100 to 240 V AC and must only be plugged into a grounded socket.
- Connect to a Computer or Network (Optional)
Connect the label printer to a computer or network using a suitable cable (USB or Ethernet). Attention: Ensure that all computers and cables connected to the label printer are properly grounded to prevent malfunctions during operation. Use USB or Ethernet interfaces for print operation, as the RS232 interface is unsuitable for fast transmission of changing data.
- Power On the Printer
Once all necessary connections have been made, switch the printer on at the power switch (32). The printer will perform a system test and then display 'Ready' on the touchscreen display (2).
- Load the Media Roll
Open the printer cover. Turn the ring (6) counterclockwise so that the arrow (5) points to the designated symbol. Remove the margin stop (4) from the roll retainer (3). Load the label roll (2) onto the roll retainer (3). Re-mount the margin stop (4) onto the roll retainer (3) and push it until both margin stops (1,4) firmly touch the label roll (2). Turn the ring (6) clockwise so that the arrow (5) points to the locking symbol.
- Insert Media into the Print Mechanics
Unroll a longer media strip and guide it towards the print mechanics. Pull the detent pin (4) to swing the pressing roller system (1) upwards. Turn lever (8) counterclockwise and lever (9) clockwise to lift both printheads. Swivel the brush (6) away from the roller (7). Move the guides (3) apart using the knob (5) until the media can pass through. Guide the media strip through the print mechanics to the pinch roller (2) and position it between the guides (3). Move the guides against the edges of the media by turning the knob (5). Fix the media by closing the upper printhead. Pull the detent pin (4), push the pressing roller system (1) downwards, and lock it with the detent pin. Turn the media roll against the feed direction to tighten the media. Close the lower printhead. Swivel the brush (6) back to the roller (7). Attention: For single-side printing, do not close the lower printhead.
- Set the Label Sensor
Loosen screw (3). Position the label sensor with the tab (4) so that the sensor (1) can accurately detect the label gap or slot between labels. When the printer is switched on, a yellow LED illuminates the sensor position to aid in placement. Tighten screw (3) once the sensor is correctly positioned.
- Load the Transfer Ribbon (if applicable)
Clean the printheads before loading the ribbon. Turn the lever (6) counterclockwise to lift the upper printhead. Slide a ribbon roll (1) onto the ribbon supply hub (3) ensuring the color coating faces downward when unwound. Position the ribbon roll so both ends show identical scale values. Hold the ribbon roll firmly and turn knob (3) on the ribbon supply hub counterclockwise until the ribbon roll is secured. Slide a suitable ribbon core (4) onto the ribbon take-up hub (5), position, and secure it similarly. Guide the ribbon through the print unit as shown in Figure 18. Secure the starting end of the ribbon to the middle of the ribbon core (4) with adhesive tape, ensuring counterclockwise rotation of the take-up hub. Turn the ribbon take-up hub (5) counterclockwise to smooth the ribbon's feed path. Turn lever (6) clockwise to lock the printhead. Open the flap (8) and load ribbon to the lower print unit (7) in a similar way, reversing directions except for knob turning. Note: For direct thermal printing, do not load a transfer ribbon. For single-side printing, do not insert ribbon into the lower print unit.
- Adjust the Transfer Ribbon Feed Path
To prevent ribbon wrinkling and print image errors, adjust the ribbon deflection. Read the current setting on the scale (1) and record it if necessary. Turn screw (2) with the Allen key and observe the ribbon's behavior during printing. Turning in the '+' direction tightens the inner edge of the ribbon, while turning in the '-' direction tightens the outer edge.
Frequently Asked Questions about Panduit
What environmental ratings do Panduit products have?
Panduit products feature comprehensive environmental ratings across multiple standards, including UL 508A Type 1, 2, 3, 4, 4X, 12, and 13; CSA Type 1, 2, 3, 4, 4X, 12, and 13; and NEMA Type 1, 2, 3, 4, 4X, 12, and 13. They meet IEC 60529 IP66 rating, providing robust protection against dust, water, and corrosion in both indoor and outdoor environments, with operating temperatures ranging from -40°C to 130°C.
What certifications and standards do Panduit products comply with?
Panduit products are certified to multiple critical industry standards, including UL (Underwriters Laboratories) in the USA and Canada, CSA (Canadian Standard Association), EN IEC 61386, LVD 2006/G5/EC, and ARRA standards. Our products meet rigorous certifications for electrical safety, environmental compliance (WEEE and RoHS), and are designed to perform in extreme temperatures ranging from -55°C to 105°C, making them suitable for demanding industrial environments.
What industries and applications are Panduit products used for?
Panduit products are engineered for critical applications across multiple industries, including commercial construction, food and beverage, oil and gas, renewable energy, transportation, and safety-critical environments. Their solutions span electrical infrastructure, wire management, cable ties, power connectors, and safety systems designed to withstand extreme conditions like high vibration, temperature variations, UV exposure, and corrosive agents. Key industries include solar and wind energy, aerospace, heavy trucking, military, commercial transportation, and industrial manufacturing.
What are the main product lines offered by Panduit?
Panduit offers a comprehensive range of electrical infrastructure products including power connectors, cable ties, grounding connectors, identification products, safety solutions, terminals, cable cleats, wiring duct, and cable tie accessories. These products are engineered for industrial environments across multiple sectors like commercial construction, food and beverage, oil and gas, renewable energy, transportation, and safety applications.
What are the key features of Panduit products?
Panduit products are engineered for robust performance in heavy-duty industrial environments, featuring a comprehensive range of solutions including cable ties, power connectors, terminals, and identification products. Key features include proven quality performance, subject matter expertise, and customer-driven innovation across multiple industrial sectors such as commercial construction, food and beverage, oil and gas, renewable energy, transportation, and safety applications. The product line is designed to maximize productivity, reliability, and safety while meeting stringent industry standards.
What is Panduit's warranty policy?
Panduit provides a comprehensive Limited Product Warranty that can be fully reviewed on their official website at www.panduit.com/warranty. All Panduit products are subject to the terms, conditions, and limitations of this current warranty. Customers are advised to review the specific warranty details for their particular product, as Panduit requires buyers to determine product suitability for their intended use and assumes all associated risks.
What technical support does Panduit offer?
Panduit offers comprehensive technical support through their dedicated customer service team, accessible via phone at 1-800-777-3300. They provide expert assistance for their full range of industrial infrastructure products, including cable ties, power connectors, terminals, and identification solutions. Customers can also access additional technical resources and product information through their website at www.panduit.com.
What accessories are available for Panduit products?
Panduit offers a wide range of accessories across multiple product lines, including cable ties, cable tie accessories, cable tie tools, identification products, cable cleats, grounding connectors, and VeriSafe accessories like the VeriSafe Network Module and Insulation Piercing Connectors. For a comprehensive view of all available accessories, customers are recommended to visit www.panduit.com for the full product catalog.
How are Panduit products typically installed?
Panduit products are engineered for comprehensive installation across industrial environments, utilizing specialized tools and techniques for precise mounting. Installation methods vary by product line - from cable ties and power connectors to terminals and identification solutions - but all are designed for robust performance in heavy-duty settings. Technicians typically use Panduit's dedicated installation tools and follow manufacturer guidelines available at www.panduit.com to ensure proper fitting and maximum infrastructure reliability.