
CompleTech CA450C2 offset pattern collinear - Frequency range: 440-475 MHz - Gain: 8 dBi - Polarization…
Documents & Media
Contact for Pricing
Call +1 (262) 252-1600 (toll-free 877-268-3700) or email [email protected] for pricing and availability.
Overview
- Frequency range: 440-475 MHz
- Gain: 8 dBi with vertical polarization
- Connector: N-/TNC-female for versatile compatibility
- VSWR <1.5 for minimal signal reflection
- IP67 rated, -40°C to +80°C operating range
Specifications
Connection Type | N-/TNC-female |
Connector | N-/TNC-female |
Frequency | 440-475 MHz |
Gain | 8 dBi |
Length | 985 mm |
Material | ABS/FG PU foam, copper |
Mounting Diameter | Ø 35-60 |
Mounting Type | 35-60 mm diameter pole |
Polarization | vertical |
Radiator Material | copper |
Radome | ABS/FG, PU foam |
Series | CA450C2 |
VSWR | <1.5 |
Weight | 1590 g |
Wind Load | 64 N @ 150 km/h |
CA230C2
offset pattern collinear - Frequency range: 221-239 MHz - Gain: 8 dBi - Polarization: vertical - Connector: N-/TNC-female - VSWR: <1.5 - Radome: ABS/FG PU foam - Radiator material: copper - Mounting: 35-60 mm diameter pole - Wind load: 90 N


CA380C3
offset pattern collinear - Frequency range: 365-395 MHz - Gain: 10 dBi - Polarization: vertical - Connector: N-/TNC-female - VSWR: <1.5 - Radome: ABS/FG PU foam - Radiator material: copper - Mounting: 35-60 mm diameter pole - Wind load: 105 NCA420C2
offset pattern collinear - Frequency range: 405-440 MHz - Gain: 8 dBi - Polarization: vertical - Connector: N-/TNC-female - VSWR: <1.5 - Radome: ABS/FG PU foam - Radiator material: copper - Mounting: 35-60 mm diameter pole - Wind load: 66 N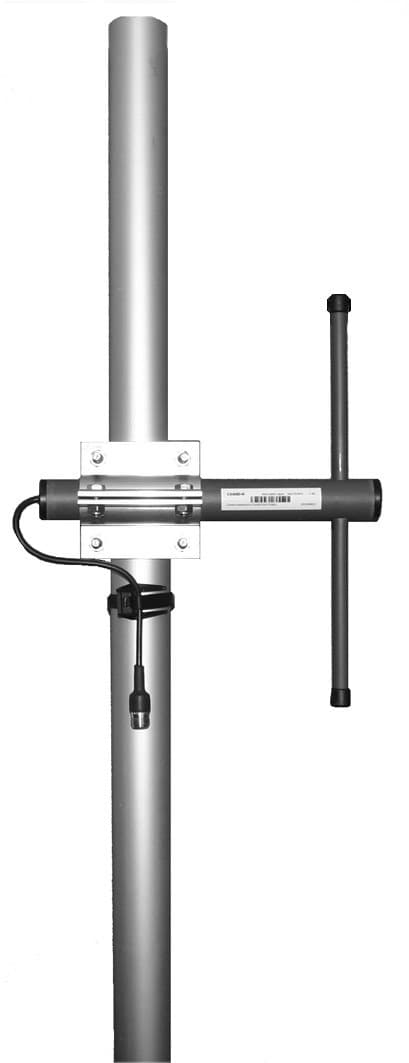
CA930D
offset pattern dipole - Frequency range: 880-960 MHz - Gain: 5 dBi - Polarization: vertical/horizontal - Connector: N-/ TNC-/ 7/16-female - VSWR: <1.5 - Radome: ABS/FG PU foam - Radiator material: copper - Mounting: 35-60 mm diameter pole - Wind load: 25 N
CA930B4
bidirectional stacked broadside - Frequency range: 880-960 MHz - Gain: 9 dBi - Polarization: vertical - Connector: N-female - VSWR: <1.5 - Radome: ABS/FG PU foam - Radiator material: copper - Mounting: 35-60 mm diameter pole - Wind load: 100 NCA160B4
bidirectional stacked broadside - Frequency range: 154-166 MHz - Gain: 9 dBi - Polarization: vertical - Connector: N-/TNC-female - VSWR: <1.5 - Radome: ABS/FG PU foam - Radiator material: copper - Mounting: 35-60 mm diameter pole - Wind load: 228 NFrequently Asked Questions
What is the operating temperature range for the CA450C2 antenna?
The CA450C2 antenna can operate in temperatures ranging from -40ºC to +80ºC.
What type of connector does the CA450C2 antenna use?
The CA450C2 antenna is equipped with N-female/TNC-female connectors.
What is the impedance of the CA450C2 antenna?
The impedance of the CA450C2 antenna is 50 ohm.
What is the gain of the CA450C2 antenna?
The CA450C2 antenna has a gain of 8 dBi.
What is the VSWR rating for the CA450C2 antenna?
The VSWR for the CA450C2 antenna is less than 1.5.
How is the CA450C2 antenna protected against lightning?
The CA450C2 antenna features DC-short circuited lightning protection.
What is the IP rating of the CA450C2 antenna?
The CA450C2 antenna has an IP67 rating, indicating it is dust-tight and protected against immersion in water.
What type of polarization does the CA450C2 antenna support?
The CA450C2 antenna supports vertical polarization.
What materials are used for the CA450C2 antenna's radome and radiator?
The radome is made of UV resistant ABS/FG with PU foam filling, and the radiator is made of copper.
What is the beam width of the CA450C2 antenna?
The H -3 dB beam width is 181º and the E -3 dB beam width is 27º.
How to Install the CA450C2 Controller
This guide provides step-by-step instructions for installing and configuring the CA450C2 Controller, ensuring proper wiring and calibration for optimal performance.
Estimated time: 45m
Tools needed:
Screwdriver, Wire strippers, Multimeter
Supplies needed:
Mounting screws, Self-amalgamating tape, Terminal connectors
- Mount the controller
Secure the CA450C2 controller to the designated mounting surface using the provided mounting screws. Ensure it is level and firmly attached.
- Connect the wiring
Use terminal connectors to connect the power and signal wires to the appropriate terminals on the CA450C2 controller. Refer to the wiring diagram for correct terminal assignments.
- Seal the connections
Cover all connectors and cable junctions with self-amalgamating tape to ensure proper weather protection and prevent moisture ingress.
- Verify the connections
Use a multimeter to check the voltage at the controller terminals to ensure proper power supply before powering on the device.
- Power on the controller
Turn on the power supply to the CA450C2 controller and observe the indicator lights to confirm that the device is functioning correctly.
- Calibrate the controller
Follow the calibration procedure outlined in the user manual to ensure the controller is accurately configured for your specific application.