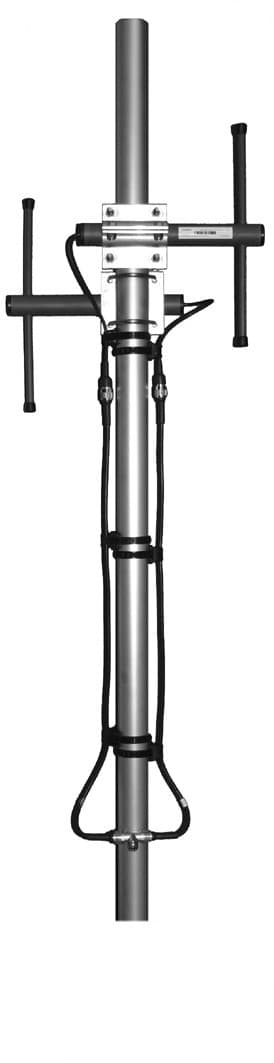
CompleTech CA420B2 bidirectional broadside - Frequency range: 405-440 MHz - Gain: 6 dBi - Polarization…
Documents & Media
Contact for Pricing
Call +1 (262) 252-1600 (toll-free 877-268-3700) or email [email protected] for pricing and availability.
Overview
- Frequency range: 405-440 MHz for reliable signal transmission
- Gain: 6 dBi with vertical polarization for consistent performance
- Dual N-/TNC-female connectors for secure system integration
- Robust ABS/FG PU foam radome protects copper radiator from environmental elements
- Wind load rating: 66 N for stability in exposed installations
- Mounts on 35-60 mm diameter poles with 66 N wind load rating
Specifications
Connection Type | N-/TNC-female |
Connector | N-/TNC-female |
Frequency | 405-440 MHz |
Gain | 6 dBi |
Length | 415 mm |
Material | ABS/FG PU foam, copper |
Mounting Diameter | Ø 35-60 |
Mounting Type | 35-60 mm diameter pole |
Polarization | vertical |
Radiator Material | copper |
Radome | ABS/FG, PU foam |
Series | CA420B2 |
VSWR | <1.5 |
Weight | 1605 g |
Wind Load | 66 N @ 150 km/h |
CA85B2
bidirectional broadside - Frequency range: 83-88 MHz - Gain: 6 dBi - Polarization: vertical - Connector: N-/TNC-female - VSWR: <1.5 - Radome: ABS/FG PU foam - Radiator material: copper - Mounting: 35-60 mm diameter pole - Wind load: 168 N


CA450C4
offset pattern collinear - Frequency range: 440-475 MHz - Gain: 11 dBi - Polarization: vertical - Connector: N-/TNC-female - VSWR: <1.5 - Radome: ABS/FG PU foam - Radiator material: copper - Mounting: 35-60 mm diameter pole - Wind load: 128 NCA420C4
offset pattern collinear - Frequency range: 405-440 MHz - Gain: 11 dBi - Polarization: vertical - Connector: N-/TNC-female - VSWR: <1.5 - Radome: ABS/FG PU foam - Radiator material: copper - Mounting: 35-60 mm diameter pole - Wind load: 132 N
CA340B4
bidirectional stacked broadside - Frequency range: 326-353 MHz - Gain: 9 dBi - Polarization: vertical - Connector: N-/TNC-female - VSWR: <1.5 - Radome: ABS/FG PU foam - Radiator material: copper - Mounting: 35-60 mm diameter pole - Wind load: 144 N
CA350C3
offset pattern collinear - Frequency range: 336-364 MHz - Gain: 10 dBi - Polarization: vertical - Connector: N-/TNC-female - VSWR: <1.5 - Radome: ABS/FG PU foam - Radiator material: copper - Mounting: 35-60 mm diameter pole - Wind load: 108 N
CA340N4
cardioid pattern notch - Frequency range: 326-353 MHz - Gain: 8 dBi - Polarization: vertical - Connector: N-/TNC-female - VSWR: <1.5 - Radome: ABS/FG PU foam - Radiator material: copper - Mounting: 35-60 mm diameter pole - Wind load: 144 NFrequently Asked Questions
What frequency range does the CA420B2 support?
The CA420B2 operates within the 405-440 MHz frequency range, making it suitable for applications requiring stable signal transmission in this band.
What is the gain of the CA420B2 antenna?
The CA420B2 delivers a gain of 6 dBi, providing consistent signal performance for industrial and telemetry applications.
What type of connectors does the CA420B2 use?
The CA420B2 is equipped with dual N-/TNC-female connectors for secure and reliable system integration.
What is the wind load rating of the CA420B2?
The CA420B2 has a wind load rating of 66 N, ensuring stability in exposed outdoor installations.
What is the radome material of the CA420B2?
The radome is constructed from ABS/FG PU foam, providing durability and protection for the internal copper radiator.
What is the length and weight of the CA420B2?
The CA420B2 has a length of 415 mm and weighs 1605 grams, making it compact and lightweight for easy installation.
What is the VSWR of the CA420B2?
The CA420B2 has a VSWR of less than 1.5, which minimizes signal reflection and optimizes power transfer efficiency.
What is the mounting diameter for the CA420B2?
The CA420B2 supports mounting on poles with diameters ranging from 35 to 60 mm.
How to Install the CA420B2 Controller
This guide provides step-by-step instructions for installing and configuring the CA420B2 Controller, ensuring proper wiring and initial setup.
Estimated time: 45m
Tools needed:
Screwdriver, Wire strippers, Multimeter
Supplies needed:
Mounting screws, Wire connectors, Self-amalgamating tape
- Mount the controller
Secure the CA420B2 Controller to the designated mounting surface using the provided mounting screws. Ensure it is level and firmly attached.
- Connect the wiring
Strip the ends of the wires and connect them to the appropriate terminals on the CA420B2 Controller. Use wire connectors to ensure secure connections.
- Seal the connections
Cover all connectors and cable junctions with self-amalgamating tape to provide weather protection and prevent moisture ingress.
- Verify the installation
Use a multimeter to check the voltage and continuity of the connections to ensure proper installation before powering on the controller.
- Power on the controller
Once all connections are verified, power on the CA420B2 Controller and observe the initial startup sequence.